Using the Report Wizard, new reports can be created in eight steps. These steps are summarized below. More details about each step is provided in additional topics.
Click the Create button on the Report Listing screen. This will open the Report editor in a new window.
Click on one of the reports in the list and click the Create a Copy button in the Report editor.
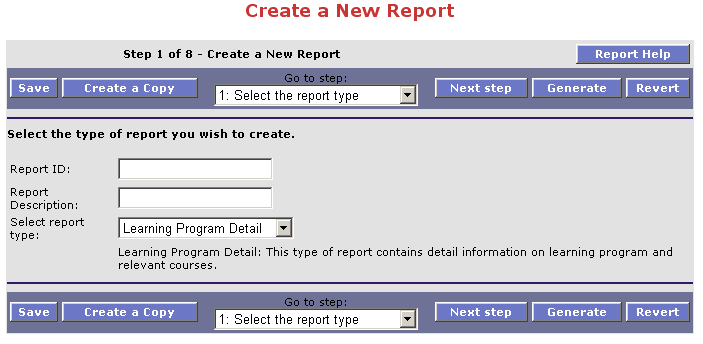
This places you at step 1 of the process of creating a report.
This first step allows you to name your report, and to pick the general category of contents. This will affect the list of data attributes from which you can select on later screens.
This section presents numerous data attributes which you can select simply by checking the appropriate box. This list reflects the items most often needed for the category of report chosen in step 1.
If items need to be grouped together on a specific attribute (Organization, for example), select the field(s) here.
The individual attributes may be arranged in any order by manipulating the position of any field in the overall list.
Filtering of data is accomplished by specifying that the report is to retrieve data on a specific value (e.g. Module ID is 'ABC101').
Select the preferred sort order. Note that in step 8 you can choose to output the report as a CSV (comma separated variable) or native Excel file. You can then open the file in Excel and perform further manipulation of the data such as sorting, column ordering and so on.
This step has been created so that experienced administrators with a knowledge of SQL may further customize the query. If you do not wish to make any changes to the SQL, proceed to step 8.
Once all items have been specified, click Save to store your custom report specification. Running the report is accomplished by clicking the Generate button.
Next topic Step 1.